Sunday, September 19, 2021

ES6 (JavaScript) Arrow Functions explain in briefly


Arrow functions have newly introduced a way to write JavaScript code in a shorter way. in javascript, we can write a function in the following way


function myFunction(item){
	console.log(item);
}

we are able to write javascript function as following way


const myFunction = function(item){
	console.log(item);
}

in arrow function, we can write the following way


const myFunction = (item) => { 
	console.log(item);
}

If the function is returning something it can write the following way


The normal way of writing the function


function myFunction(item){
	return "Item is: " + item;
}

above code can write as follows


const myFunction = function(item){
	return "Item is: " + item;
}

The above code can write with arrow function


const myFunction = (item) => {return "Item is: " + item;}

if it’s a single line return keyword and brackets can be omitted as follows


const myFunction = item => "Item is: " + item;

See more details in the following link

https://developer.mozilla.org/en-US/docs/Web/JavaScript/Reference/Functions/Arrow_functions


Code snippets are added using highlight.js . The following blog explains how to add it to the blogger site. 


Saturday, September 18, 2021

Apply SharePoint Template to site in SharePoint Online

 This article describes applying a built-in template to the site. Following are the steps.


Go to the preferred site that you need to add a custom theme and click on the gear wheel in suite bar.


Then You will able to see the “Apply a site template” under the Settings.


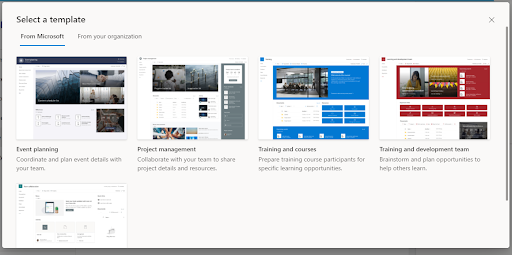
When it displays the "Select a template" you are able to see two tabs. 

"From Microsoft":- by default when we are creating the team site it will apply a "Team collaboration" template other than that Microsoft has introduced Event Planning, Project Management, Training and courses, Training and development team. According to your requirement.

"From your organization":- Some organisations have built their own custom template in this section you can select the organisation level custom theme.


Select the preferred template to apply. For example, I select a Project management template to show you. then it displays the "Preview and apply template" window explaining the capabilities of the template.


 Click on the "Use template" button to apply the template.


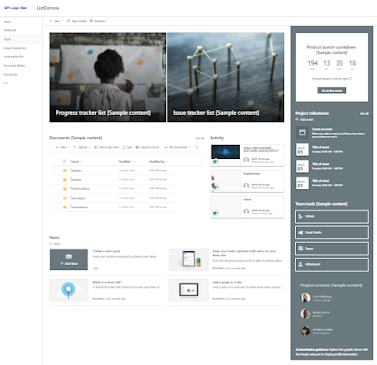
After applying the template site will look like following


Once the template is added as it explains according to the scenario it has generated the relevant list to cater for it. Presently, for project management template, it has added following list.


Monday, April 5, 2021

Customizing Office 365 Suite Bar Theme with logo image


Here I'm going to explain how to change the logo in SharePoint online. In This method, the logo is changed at the tenant level and it is displayed on the office suite bar.

Select Admin from Apps


Once the admin panel has loaded. Click on … Show all


Click On Settings to expand to the option. Then select the Org settings


Under Org settings select the Organization profile tab.


Select the Custom themes


T hen it will display the Custom Thames pane on the right-hand side


Under the Custom themes pane Select the Upload an image Under Use a Custom logo image option


then it will visible the Upload an image option so the user can Browse and select the relevant logo image (logo image dimension should be 200 x 30)


 After selecting the logo image press the Save button to save changes. 


Once settings are successfully saved it will show the following message.


Then logo will display beside the text


Friday, January 22, 2021

How to navigate to power automate admin center

 In this article, I am explaining how to navigate the Power Platform Admin Center. There were two methods,

  1. Direct Navigation by URL
  2. Navigate Through  O365
1. Direct Navigation by URL
As per today, 22/01/2021 following URL is navigating to the Power Automate Platform

2. Navigate Through O365

If you are log with the O365 with Tenant Admin the follow the below steps

In Admin Center you can see the Customize Navigation item, below that Click on the ."..Show all" item  to expand 

Then Admin centre is expanding the list with more items, So select the "All admin centres"


 So you can see all the admin centres, from that to choose the relevant item. in this scenario, we need to access the "Power Automate Admin Center".


Once you select the "Power Automate" Then it loads the Power Platform Admin Center