Thursday, December 14, 2023

DocuSign Power Automate Signature Process


Normally below process should follow to run DocuSign Power Automate process


Before Creating the Power Automate you should create the word document to do that. Therefore you need to go through the following steps

Create Document with the place holders

  1. Select the Word document that requires a signature. 

  1. Insert the necessary placeholders into the document.  


Once the placeholders are in place, alter their color to white. 


Upload the signed document to the Document Library. 


Add the “Create Envelop Action and Select the Account then the add the Email subject. 


Add Action “Get the content using path  


Add the “Create Envelop Action and Select the Account then the add the Email subject. 

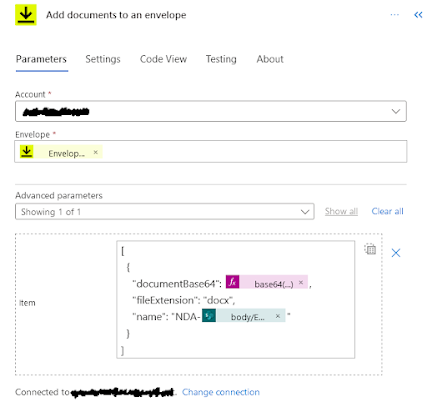
Using base64 method convert file content

base64(outputs('Get_file_content_using_path')?['body'])

select the file extension as docx and name as what as you like


Add “Add recipient to an envelope (V2)” action. 

  • - Select Account 

  • - Add Envelop Id 

  • - Select Recipient type 

  • - add signature name and email address 


(Note:- In Power Automate old designer you need to specify for the click on Show advance options then it will expand as follows then set Signing order value )


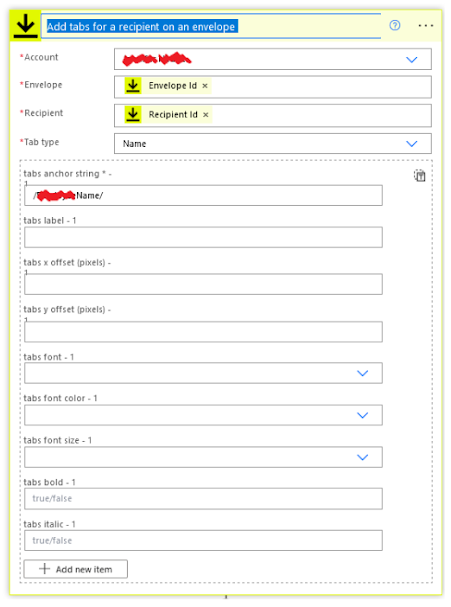
Add tabs for a recipient on an envelope. 

In the DocuSign Power Automate action, the placeholders in the Word Document are referred to as "tabs." Within the tabs section, under 'Anchor String,' you should input the name of the Word document placeholder and choose the appropriate Tab Type that corresponds to it. 


Finally Send envelop action to send the envelope to recipients. 


Once Power Automate Reach to the Send envelop DocuSign will handle the signature process. Supposes end user need to copy document to the SharePoint Library then you need write another Power Automate Flow


Save the Signed Document 

 
After the entire signing process is completed, the document should be saved in the Document Library or attached to the list item. 


The trigger is occur once the completion of the signing process. This means when all documents have been fully signed and you need to store the signed version either in the Document Library or as an attachment. 

To utilize this trigger, you must have a Business Pro Pricing plane in DocuSign. 


Then Create the variable for store file name with type

Then we need to get the document from the envelop


Then we can have two options to performed,

    1. Create File in Specified Document Library

    2. Add attachment to relevant list item.


    1. Create File in Specified Document Library

Creating file is easy you need to specify the path an file name and we can get the file content form envelope


    2. Add attachment to relevant list item.

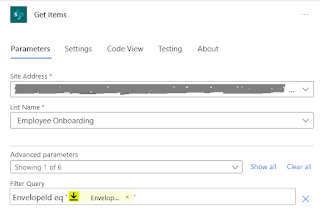
    When you select the attachment option then you need to store the envelop ID in the list in my pervious flow I have save the envelop id into list and this option I retrieve the relevant item content.

To retrieve by envelop you need to use the Get Items action.


Then it is take as a list therefor power automate adding the "Apply to each"

Finally using "Add attachment"


You can find out the whole flow from following figure


For more information's you can watch following YouTube video


Tuesday, December 12, 2023

Add tabs for a recipient on an envelope


In this time I would like to introduce about the adding place holder to the DocuSign document and use in power automate. In DocuSign in it is call as tabs. In power automate the action is call as "Add tabs for a recipient on an envelope ". Following image shows the old power automate action


Now power automate has chant the action UI now New Screen you can see as follows


First you need to add envelop and Recipient as I describe earlier blogs when you have introduce the place holder to you document you need to the place holder name here under the Anchor String . If you need further more formatting changes such as bold font, colure changes you can do in this action.


Monday, December 11, 2023

Sunday, December 10, 2023